What is a sitemap, and do you need one?
I’m going to be honest and admit that up until this post was published, The Web Hut didn’t have a site map. Well, we had one, but hadn’t done anything with it. We work hard on making other people’s website’s tick all the boxes and sometimes neglected to give our own a little bit of love. So, it was time to get one submitted to Google. And we’re going to show you how to do it. But first…
What is a site map?
A sitemap, known as an XML sitemap, is simply a list of all the pages on your website. It is just as the name suggests – a map of your website that you can submit to the Google Gods to improve your SEO somewhat.
It’s also an important feature to have when it comes to 404 pages, and can help your website visitors stay on your site and find what they need rather than close your website in frustration.
According to Yoast, if your website is set up properly, is well structured and not too complicated, you shouldn’t need a site map at all.
But anything you can do to make it easier for Google to crawl your site and index it is going to work in your favour.
How do you submit a site map to Google?
Firstly, you need an SEO plugin.
We recommend Yoast because the plugin is user friendly and gets great results in terms of SEO.
So, install the plugin (the free version is fine for the purpose of submitting a site map) and configure it with your site.
Then…
1. Get your site map URL
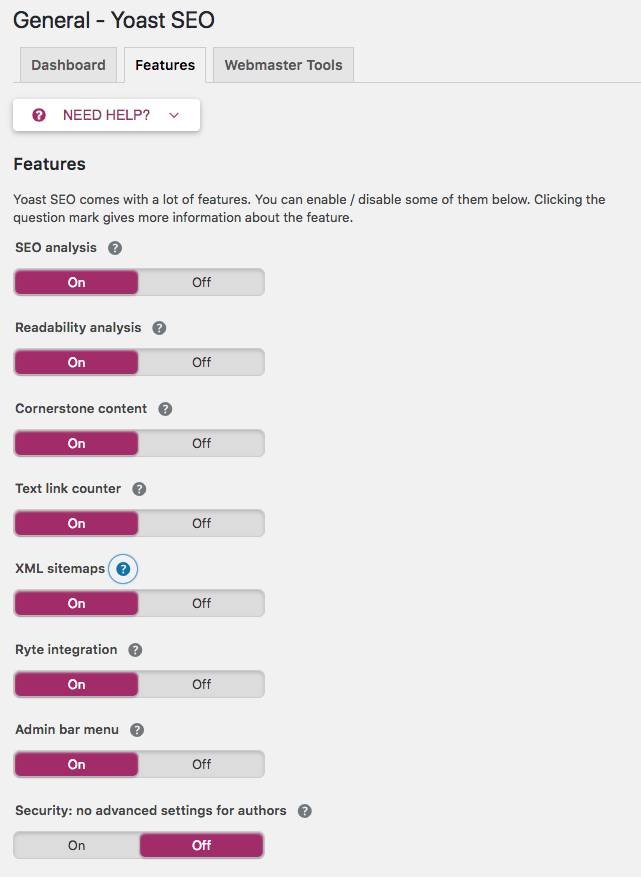
Under the General settings in the Features tab, make sure the XML Sitemaps toggle is set to ON. Then, click on the question mark to open up more options and click ‘See the XML Sitemap’.
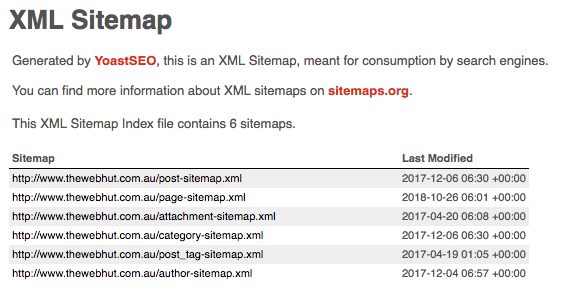
You’ll then see something like this, and this is your sitemap! You will need the actual URL (eg: https://www.thewebhut.com.au/sitemap_index.xml) – so keep that handy.
2. Set up a Google Webmasters account
This involves quite a few steps, but in a nutshell, head to https://www.google.com/webmasters/tools/home and follow the prompts to set up your website.
If you already have a Google account, you can log in and set everything up, otherwise you’ll need to create one. Then, click on “Add a Property” and enter your website domain name. You’ll then need to verify that you own this domain.
3. Verify your website
This part is a bit harder and involves some code, so we found an excellent video explaining how it’s done that you can find here. Once you’re all verified, you can submit your site map.
4. Submit your site map to Google
You’re on the home stretch!
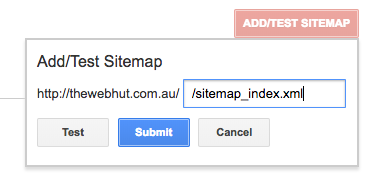
Now you you need to add and submit your site map. Grab that URL that you found in Step 1 and copy and paste the last part of the URL into the box when prompted.
Hit submit and you’re done!
It will take a bit of time (give it a month) for Google to start getting information from your website in order to give you stats and data about your site, such as search traffic and external links. Check back in regularly and soon you’ll be able to see some information.
You can also set up Google Analytics to see important information about your website.


